/* Mostly about Oracle APEX, ORDS, PL/SQL and a bit of Linux in between */
Setup GitLab Runners and Container Registry for CI/CD with SQLcl Projects (Part 1)
With the release of SQLcl 24.3.0, Oracle has introduced a new feature called “SQLcl Projects”, which allows you to export incremental changes to database objects, Oracle APEX applications and ORDS modules, and deploy them to database schemas using Liquibase changesets. To streamline this process, I created a CI/CD utility framework for SQLcl Project deployments with name ESQUPRO that can be used in GitLab pipelines. In this blog series, I would like to share my ideas and experiences gained whilst implementing this functionality. We will create our own Docker image (based on Oracle’s SQLcl image) and save it in GitLab’s Container Registry.
The second issue of Red Stack Magazine, released on May 8 and focused on APEX Development, included an article I wrote on this subject titled “Mit SQLcl und GitLab-Pipelines den CI/CD-Prozess optimieren” (de). You can access the article here: https://my.doag.org/magazines/id.231.ab-sofort-verfuegbar-red-stack-magazin-nr-2-2026/.
CI/CD workflow with SQLcl Projects
With SQLcl Projects, changes to database objects can be versioned incrementally and within a predefined structure based on a Git repository. To achieve this, you first need to create an SQLcl project inside a Git repository using the project init command. The directory structure will look like as follows:
- .dbtools
- dist
- src
Configuration files will be placed in the “.dbtools” directory. These include, for example, project‑related settings (such as the project name or the default Git branch) as well as filter definitions (e.g., WHERE clauses used during export operations).
When using project export, database object definitions are written as SQL files to the “src” directory. The DDL is generated using DBMS_METADATA, ensuring that the exported objects reflect their state in the DEV environment. These exports must be performed in a sub‑branch of the branch defined as “defaultBranch” in the project configuration. This allows SQLcl to detect incremental changes when the project stage command is executed. Internally, SQLcl uses JGit to compare the contents of the “src” directory between the feature branch and the default branch (via a git diff). This automatically generates Liquibase changesets for the deltas and saves them in the “next” folder within “dist”. Finally, the sub-branch is merged back into the original branch.
Before releasing a new application version, project release can be used to finalize the changesets in “dist/next” and move them into a dedicated version directory (for example, dist/v1.0). This keeps versions cleanly separated and allows them to be deployed one by one at a later time.
A release rollout consists of the commands project gen-artifact and project deploy. The former creates a compact ZIP archive of the dist directory, which is then processed by SQLcl during the deploy step and applied to a target database schema. This deployment is executed via the included install.sql script, which triggers the required Liquibase command (lb update).
Setup GitLab Runner and Container Registry
CI/CD pipelines are executed using the GitLab Runner, which acts as an agent for executing jobs. The available “executors” – a specific type of runtime environment – include the Shell Executor for running jobs on the host system, the Docker Executor for execution within a virtual container, and a Custom Executor. Docker is a strong choice for CI/CD pipelines built around SQLcl projects. A GitLab Runner can not only use Docker images, but also build and push them to the GitLab Container Registry (or any external registry).
The Container Registry is disabled by default and the Runner not part of the core GitLab installation, so we need to install and configure them manually. While the Runner image can be obtained from the official Docker repository (gitlab/gitlab-runner), the Container Registry can be enabled inside the GitLab configuration file when it is installed via Omnibus. For a bare‑metal installation, at least the following options must be configured in the gitlab.rb file:
# /etc/gitlab/gitlab.rb

registry['enable'] = true
registry_external_url 'https://registry.domain.tld'
gitlab_rails['registry_enabled'] = true # for GitLab Token Auth against registryThe changes can then be applied using sudo gitlab-ctl reconfigure.
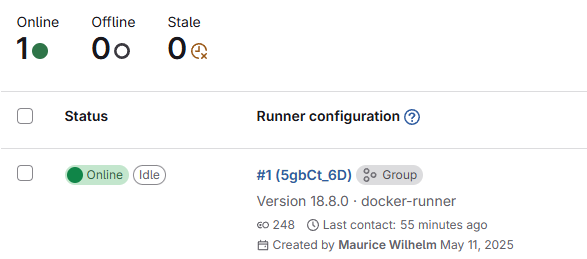
Individual runners must be registered as instance‑, group- or project‑level runners via the GitLab web UI. This process generates an authentication token, which must be provided when registering a new runner. There are two ways to create a new runner: you can either register it manually by running the gitlab‑runner register command inside the runner container, or you can define all required settings directly in the config.toml file. The following configuration serves as an example:
# /etc/gitlab-runner/config.toml

concurrent = 1
check_interval = 0
connection_max_age = "15m0s"
shutdown_timeout = 0

[session_server]
  session_timeout = 1800

[[runners]]
  name = "docker-runner"
  url = "https://git.domain.tld/"
  id = 1
  token = "glrt-<token>" # GitLab Runner Authentication Token
  token_obtained_at = 2026-05-14T00:00:00Z
  token_expires_at = 0001-01-01T00:00:00Z
  executor = "docker"
  [runners.custom_build_dir]
  [runners.cache]
    MaxUploadedArchiveSize = 0
    [runners.cache.s3]
    [runners.cache.gcs]
    [runners.cache.azure]
  [runners.docker]
    image = "alpine:latest"
    privileged = false
    disable_entrypoint_overwrite = false
    oom_kill_disable = false
    disable_cache = false
    volumes = ["/var/run/docker.sock:/var/run/docker.sock", "/cache"]
    shm_size = 0
network_mtu = 0Next, the GitLab Runner can be created as a Docker container as follows. It will automatically register our “docker-runner” as well.
docker run -v /etc/gitlab-runner:/etc/gitlab-runner -v /var/run/docker.sock:/var/run/docker.sock \
--restart=always \
--detach \
--name gitlab-runner \
gitlab/gitlab-runner:alpineAfter registration, the GitLab Runner starts communicating with GitLab by polling the GitLab API for jobs.
In the second part of this blog series, I’ll explain how to create GitLab CI/CD pipeline templates and use the Container Registry to store our own Docker image.